Files
The below instructions will walk you through how to manage the new slider addition to add and remove slides when needed.
Image Properties
Please make sure that each image is following the below properties to ensure optimal page speed and all slides are equal in size.
Image Dimensions – 3744 pixels wide and 1167 pixels tall.
Image Size – Ensure that the image size is less than 300Kb in size
Naming Conventions – slide-1.jpg, slide-2.jpg, slide-3.jpg
Adding the Slides
Once you are logged into the backend, click the SiteCore launchpad logo in the top left corner.

To upload the first slide image, navigate to Peet -> Header Images -> ACT and click to open the Googong folder. Then using the options, click the upload file button.

Then follow the steps to upload the first slide. Please make sure that the image size conforms the Image properties above.
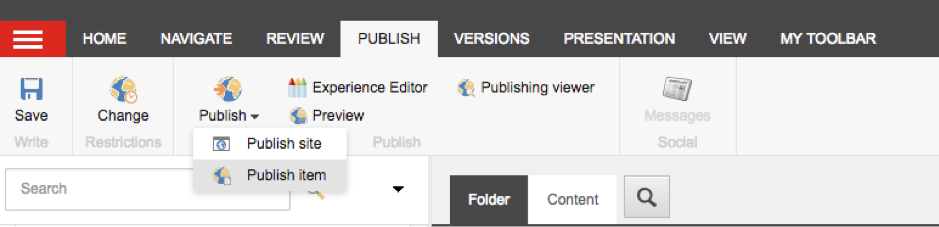
Click on the Publish tab and click “Save” and then click the Publish -> Publish item. Make sure that smart publish, publish subitems and publish related items are ticked.
To upload the second slide image in the same media upload section navigate to General Images -> ACT and click on the Googong folder.
Scroll down to find and click a folder called “slider-images”. To upload a new slide, click the upload file button. Ensure that the name of slide follows the above naming conventions and is the correct size before uploading. Once the image is uploaded, click on the image and follow the instructions above to save and publish. Repeat these instructions to add slide three into the slider-images folder.
Adding the First Slide
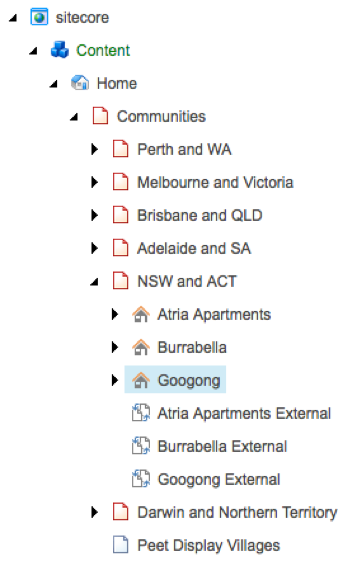
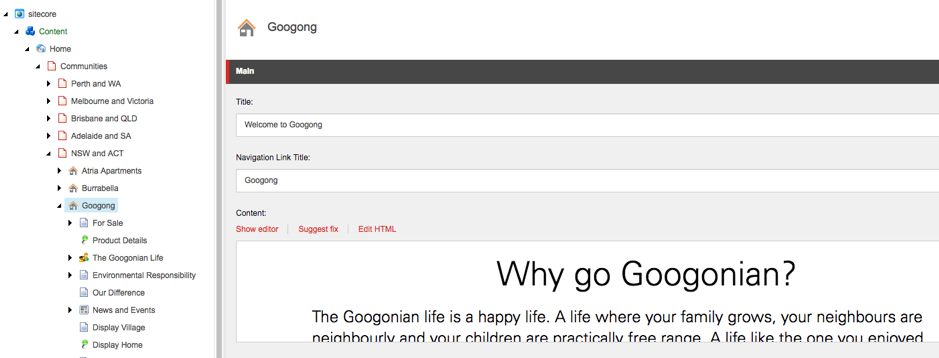
Click the SiteCore launch icon and click Content Editor. Then navigate to Home -> Communities -> NSW and ACT -> Googong
Click on Experience editor on the top ribbon.

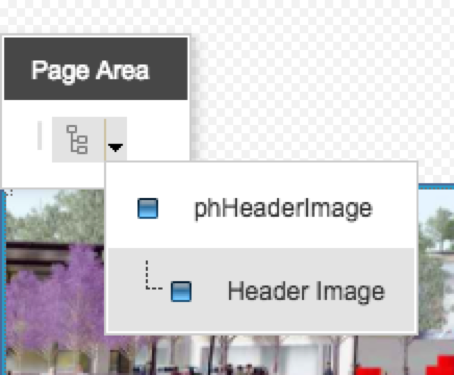
Then hover over the featured image module until you see a blue border appear.
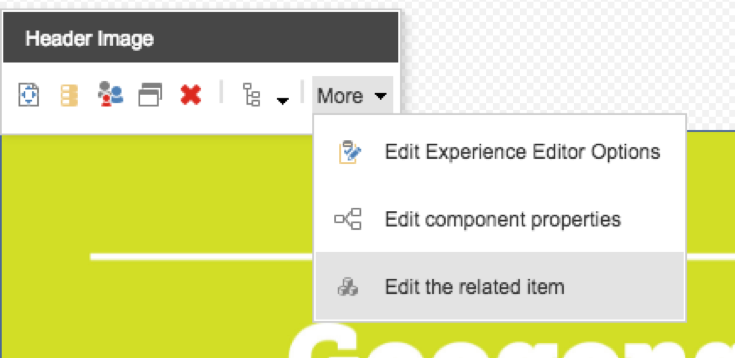
Click this blue border and then click on the dropdown that appears and click Header Image.
Then click more to edit the related item.
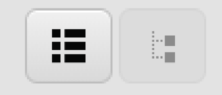
Click the second icon (shown below) to open up a list view of all header images. Locate the image you would like to use, select the image and press the select button
If you would like this image to link to a page, click “insert link” and choose the page that you want linked. Click the page and press the insert button.

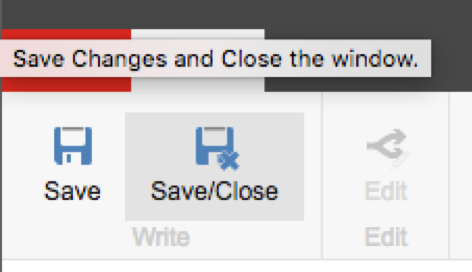
Once finished click “Save and Close”.
To show the second and third slides in the slider, close the experience editor and locate the Googong Home Page properties in the content editor.
Scroll down until you see the JavaScript console and here is where the additional two slides will be controlled. Please be careful with all changes here as slider may not function as a result.
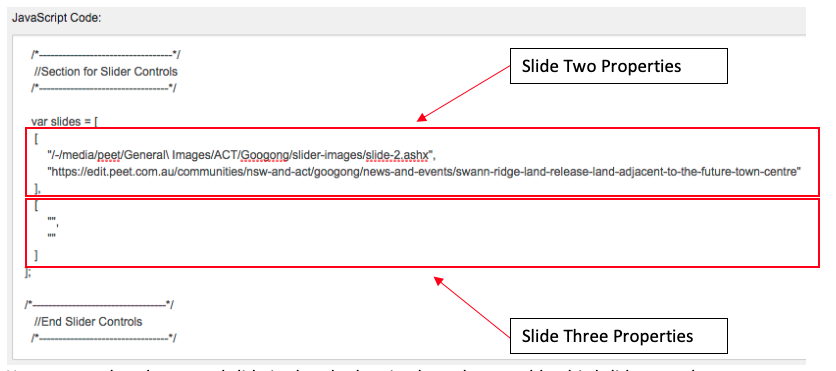
You can see that the second slide is already showing here, but to add a third slide copy the image path “/-/media/peet/General\ Images/ACT/Googong/slider-images/slide-2.ashx” without copying the rabbit ears.
Paste this between the first rabbit ears inside the slide three properties section. Then make sure to edit the path to change “slide-2.ashx” to “slide-3.ashx”. If you would like the third slide to link to a page, insert the full url to the page inside the second rabbit ear section.
If you would like to remove slides from the slider, simply remove the path and the url leaving just empty rabbit ears, like the slide three properties is showing.
Click on the Publish tab and click “Save” and then click the Publish -> Publish item. Make sure that smart publish, publish subitems and publish related items are ticked.
should now see the new slide showing on the website home page.